How to Blur Image
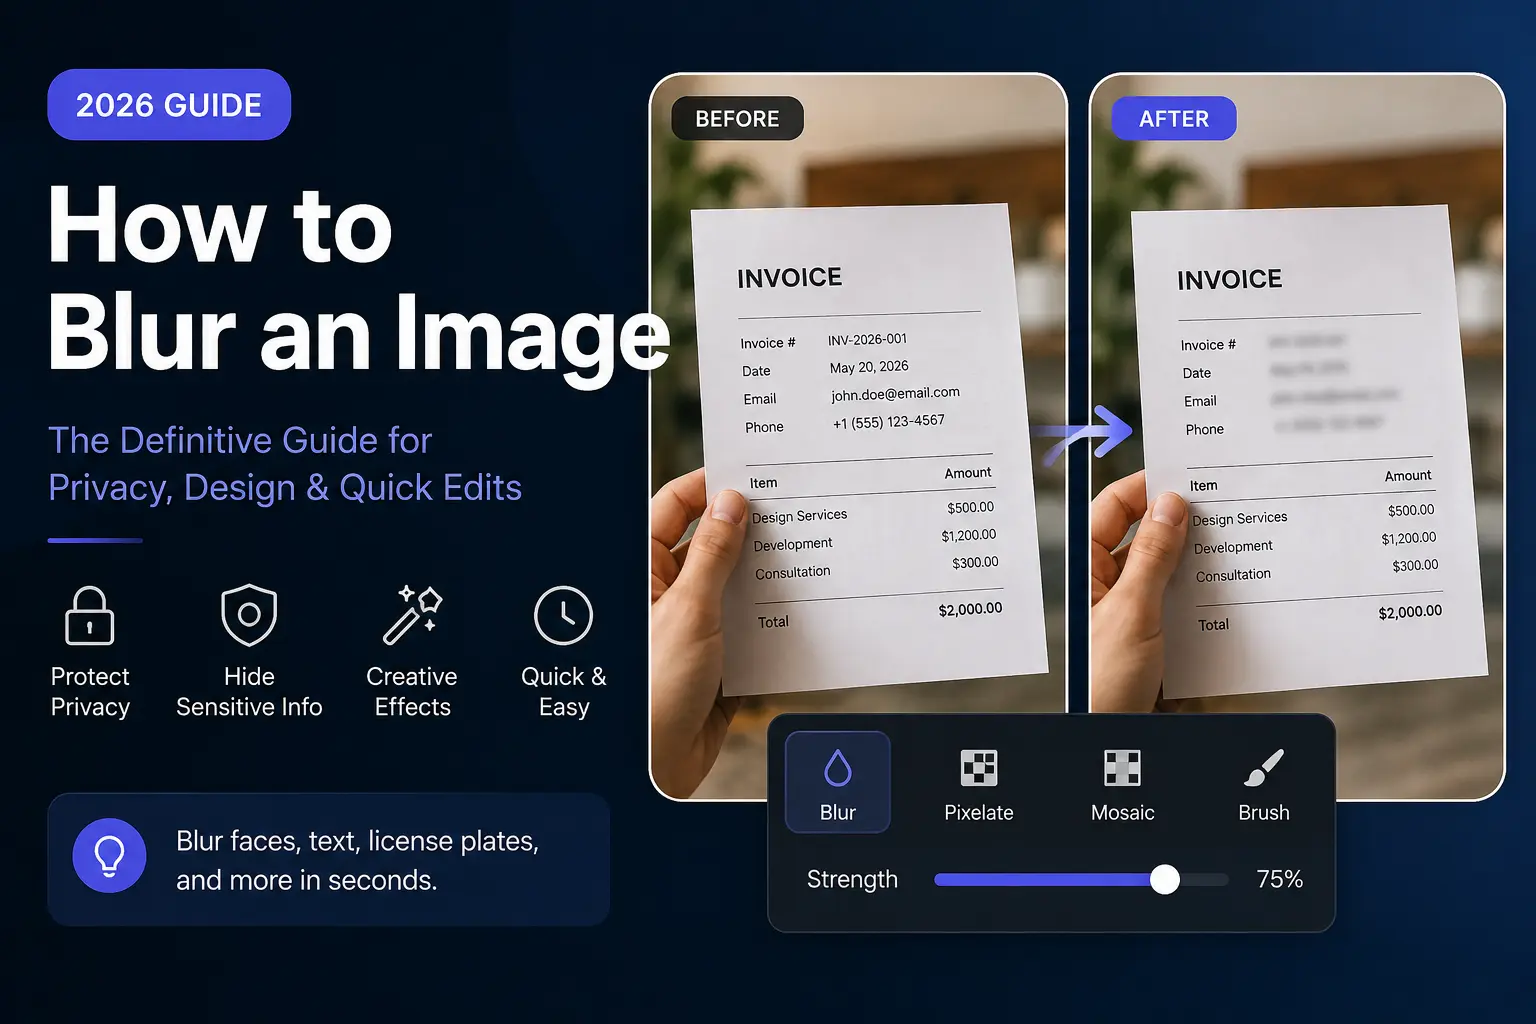
You’ve probably already used a phone app or online editor to soften a photo or hide a face, but choosing the right blur method—and applying it strongly enough to truly protect sensitive details—is less obvious. A light blur may still leave text or faces recognizable after export. In this guide, we’ll explain how to blur an entire image or a selected area on phones and computers, compare blur with pixelation, and show you how to check the final file before sharing it.
Key Takeaways
- Image blurring reduces sharp detail by softening neighboring pixels and can be applied to an entire image or a selected area.
- Online editors, mobile apps, and desktop software can blur faces, text, license plates, backgrounds, and other image regions.
- Gaussian or soft blur works well for artistic effects, while pixelation or an opaque block is usually clearer for censorship and redaction.
- Privacy edits should cover the complete sensitive region and be checked again in the exported file before sharing.
- Browser-based tools may process images locally or upload them to a server, so users should review the tool’s privacy behavior before editing sensitive content.
- PNG generally preserves edited edges better, while high-quality JPG is often sufficient for photographs and social posts.
- The safest workflow is to edit a copy, inspect the final image at full resolution, and share only the protected version.
What Is Image Blurring and How Does It Work?
Image blurring is an editing process that reduces visible detail by softening the contrast between neighboring pixels. This smoothing effect makes edges less sharp and can hide faces, text, license plates, or background clutter depending on how and where you apply it.
For example, a Gaussian blur spreads pixel values using a bell-shaped curve, creating a natural soft-focus look often used in portraits. By contrast, a mosaic or pixelation effect replaces groups of pixels with solid-colored blocks, which is more visually obvious and commonly used for censorship.
Blurring can be applied to the entire canvas or to a selected region using brushes, shapes, or automatic detection tools. Many online photo editors and mobile apps now include one-tap blur or pixelate options, making it easy for beginners to protect privacy or create design effects.
Why Blurring an Image Matters
Blurring an image matters because it can protect identifiable details while allowing you to share screenshots, photos, or documents safely. This is especially important for remote teams, customer-support agents, journalists, and anyone who shares screens or images online.
First, blur helps conceal faces, names, addresses, phone numbers, and other personal data in screenshots before posting them to social media or support tickets. For example, a support agent might blur a customer’s email address in a bug report screenshot to prevent accidental exposure.
Second, blur supports creative goals such as depth of field, background separation, and visual emphasis in thumbnails or marketing visuals. At the same time, privacy protection requires checking the exported image, not only the editing canvas, because a weak blur may leave text or faces recognizable.
Moreover, no method should be considered secure until the final exported image has been inspected. This is why privacy-focused guidance emphasizes covering the complete sensitive region and verifying the result at full resolution.
How Do You Blur Part of an Image Online?
Blurring part of an image online involves selecting the target area, applying a blur or pixelation effect, adjusting its strength, and exporting a separate edited copy. This workflow works in most browser-based editors and is ideal for quick edits on any device.
First, open a browser-based editor that supports blur or pixelation. Tools like BlurShot, PictureConvert, and FreeDeskTools process images locally in your browser, which is safer for sensitive content than editors that upload files to a server.
Second, upload or drag your image into the editor, then select the blur, pixelate, mosaic, brush, or shape tool. Paint over or draw a rectangle around the target area, including the edges around faces and text to avoid leaving readable borders.
Third, adjust blur intensity, brush size, feathering, or pixel size until the sensitive detail is no longer readable in the preview. Finally, export as JPG or PNG and reopen the downloaded file to verify that the sensitive detail is truly concealed.
💡 For more details on photo editing techniques, read our guide on how to blur photos or explore our guide to blur tools.
How Do You Blur an Entire Image?
Blurring an entire image means applying a soft-focus effect to the full canvas, usually to reduce background detail or create a stylistic look. This is common in portraits, thumbnails, and social posts where you want the subject to stand out.
First, open the image in an editor and select the full canvas or apply a global filter. Choose Gaussian, lens, or soft-focus blur and adjust the radius or strength gradually to avoid destroying the intended subject.
Second, preserve the original file and export a separate edited copy. PNG generally preserves edited edges better, while high-quality JPG is often sufficient for photographs and social posts.
For example, a marketer might blur an entire background behind a product shot to emphasize the item while keeping the overall image natural. This action can improve visual hierarchy without requiring advanced design skills.
How Do You Blur a Face in a Photo?
Blurring a face in a photo involves covering the complete facial region with a strong blur, pixelation, or solid block to prevent recognition. This is a common privacy task for social media, news reporting, and support documentation.
First, use automatic face detection when available, then inspect every face manually. Many privacy-focused editors include an “Auto Detect Faces” button that draws regions over detected faces, which you can then resize and strengthen.
Second, choose pixelation or a solid opaque block when the goal is redaction rather than visual softness. For faces, strong pixelation is generally the safer choice because it removes structural detail more decisively than a light blur.
Third, cover the complete region, including hair, ears, and borders, and check reflections or nearby contextual clues before sharing. This step prevents accidental identification through partial features or metadata.
How Do You Blur Text in a Screenshot?
Blurring text in a screenshot means obscuring characters so they cannot be read or reconstructed by OCR or deblurring tools. This is critical when sharing bug reports, receipts, or internal documents.
First, use a freehand brush or rectangular selection to cover the text line completely, including surrounding characters. For private numbers, emails, addresses, client names, and account details, redaction is usually the safer choice.
Second, choose pixelation or a solid opaque block when the information must be completely hidden. A solid block (a filled rectangle) replaces the pixels entirely, so there is nothing left to recover.
Third, check for duplicate text, metadata, or nearby contextual clues that could reveal the same information. Remove unnecessary metadata when privacy is important, and keep the original file private.
For real-time browser privacy while taking screenshots or screen recording, consider using AIBlurWeb to automatically mask credentials, emails, and sensitive form fields. Also check our guide on screen privacy.
How Do You Blur a License Plate?
Blurring a license plate means covering the entire plate region with a strong blur, pixelation, or solid block to prevent vehicle identification. This is common in dashcam footage, parking photos, and public posts.
First, select the full plate area, including borders and any reflective highlights. Use a rectangular or brush tool to ensure no characters remain visible at the edges.
Second, choose coarse pixelation or a solid block for stronger privacy. For visual privacy where appearance matters, blur is sufficient and looks better, but for plates, stronger treatments are often recommended.
Third, export the edited image and reopen it to confirm the plate is unreadable. This final check ensures the redaction is baked into the pixels permanently.
How Do You Blur an Image on iPhone?
Blurring an image on iPhone can be done using the built-in Photos editor, third-party apps, or a browser-based tool that runs locally. This is useful for quick privacy edits before sharing to social media or messages.
First, open the photo in the Photos app and tap Edit. Use the markup tools to draw over sensitive areas, or install a dedicated blur app from the App Store for more control.
Second, for browser-based edits, open Safari and visit a local-processing blur tool like BlurShot or PictureConvert. Upload the image, apply blur or pixelation, and download the edited copy directly to your device.
Third, save the edited image to your Photos library and share only the protected version. Avoid sharing the original file, and remove metadata if the app supports it.
How Do You Blur an Image on Android?
Blurring an image on Android follows a similar pattern: use the built-in editor, a third-party app, or a privacy-focused browser tool. This ensures you can protect sensitive details before posting to WhatsApp, Instagram, or email.
First, open the photo in Google Photos or your device’s gallery app and use the markup or blur tools if available. Many Android editors include a “blur” or “pixelate” option under editing effects.
Second, for stronger privacy controls, open Chrome and visit a local-processing blur tool. Upload the image, apply the desired effect, and download the edited file without uploading it to a server.
Third, verify the exported image at full resolution and share only the edited copy. This step prevents accidental exposure of sensitive information.
How Do You Blur an Image on Windows or Mac?
Blurring an image on Windows or Mac can be done using built-in editors, desktop software, or a browser-based tool that processes files locally. This is ideal for precise control and batch editing.
First, on Windows, open the image in Photos or Paint and use the blur or brush tools. On Mac, use Preview or Photos to apply blur effects or draw over sensitive areas.
Second, for advanced control, use desktop editors like GIMP, Photoshop, or Affinity Photo to apply Gaussian blur or pixelation to selected regions. These tools offer precise selections and export options.
Third, for quick privacy edits, open a browser and use a local-processing tool like FreeDeskTools or BlurShot. These editors run entirely in your browser, ensuring your images are never uploaded.
What Is the Difference Between Blur and Pixelation?
Blur and pixelation are both concealment methods, but blur smooths neighboring pixels while pixelation replaces them with hard-edged blocks. This difference affects both appearance and privacy strength.
First, blur creates a soft, natural look and is best for artistic effects and background separation. For example, a portrait photographer might blur the background to emphasize the subject while keeping the overall image natural.
Second, pixelation creates an obvious censorship effect and is usually clearer for redaction. For censoring, coarse pixelation is generally safer than a light blur, because blurred text and faces retain faint underlying shapes that can occasionally be recovered.
Third, choose a solid opaque block when privacy matters more than appearance. Redaction is the safest option for sensitive text, account numbers, customer data, receipts, invoices, and internal references.
| Method | Security Level | Best For | Reversible? |
|---|---|---|---|
| Gaussian Blur | Low–Medium | Text, email addresses, non-critical data | Partially with advanced deblurring |
| Pixelate | Medium–High | Faces, license plates, identifiable objects | No (detail permanently destroyed) |
| Blackout (Solid Block) | Maximum | SSNs, credit cards, passwords, classified info | No (pixels completely replaced) |
Is Blurring an Image Enough to Protect Private Information?
Blurring an image is enough to protect private information only if the blur is strong, covers the complete region, and is verified in the exported file. Weak blur or partial coverage can leave details recoverable.
First, a light blur or pixelation can sometimes be reversed, because the original pixels are still there in a scrambled form. For predictable content like numbers, software can sometimes reconstruct them.
Second, for anything genuinely sensitive, use a solid block, not a blur. Faces or general privacy in a casual photo → a strong blur is usually fine, but account numbers, IDs, and anything that must not be recovered require a solid block.
Third, privacy protection requires checking the exported image, not only the editing canvas. This final inspection ensures the redaction is permanent and no unwanted information remains visible.
How Do You Blur an Image Without Losing Quality?
Blurring an image without losing quality involves using the right export format, avoiding excessive compression, and preserving the original file. This ensures your edited image remains sharp where it should be.
First, choose PNG for images with text, logos, or sharp edges, as PNG generally preserves edited edges better. For photographs and social posts, high-quality JPG is often sufficient.
Second, avoid re-editing the same file multiple times, as each export can introduce compression artifacts. Instead, edit a copy and keep the original file private.
Third, use tools that process images locally and support high-quality exports. This prevents unnecessary quality loss from server-side compression or format conversion.
Which Free Image Blur Tool Should You Use?
The best free image blur tool depends on your device, privacy needs, and the type of edit you want to perform. Below are top recommendations for browser, mobile, and desktop workflows.
First, for browser-based edits, use BlurShot, PictureConvert, or FreeDeskTools. These tools process images locally in your browser, ensuring your files are never uploaded to a server.
Second, for mobile edits, use the built-in Photos editor or a dedicated blur app from the App Store or Google Play. Many apps include one-tap blur or pixelate options for quick privacy edits.
Third, for desktop edits, use GIMP, Photoshop, or Affinity Photo for precise control. These tools offer advanced selection, blur, and export options for professional-quality results.
| Tool | Platform | Privacy | Best For |
|---|---|---|---|
| BlurShot | Browser | Local processing | Quick privacy edits |
| PictureConvert | Browser | Local processing | Blur without upload |
| FreeDeskTools | Browser | Local processing | Advanced redaction |
| Photos (iOS/Android) | Mobile | On-device | Casual edits |
| GIMP / Photoshop | Desktop | On-device | Precise control |
What Should You Do After Blurring an Image?
After blurring an image, you should inspect every edited region, reopen the exported file, and confirm that no sensitive detail remains readable. This final safety check ensures your privacy edits are effective.
First, zoom in and inspect every edited region at full resolution. Reopen the exported file rather than relying only on the editor preview, as compression or export settings can affect visibility.
Second, confirm that text cannot be read and faces cannot be recognized. Remove unnecessary metadata when privacy is important, and keep the original file private.
Third, share only the edited copy and choose PNG or high-quality JPG based on the destination and required image quality. This ensures your image remains sharp where it should be and concealed where it matters.
Conclusion: Blur Images With the Right Method
The correct blur method depends on whether your goal is design, emphasis, or privacy. Use precise selections, strong enough settings, and a final export check to ensure your edits are effective.
First, remember that soft blur is best for artistic effects and background separation, while pixelation or an opaque block makes censorship more visually obvious. Second, privacy edits should cover the complete sensitive region and be checked again in the exported file before sharing.
Finally, edit a copy, inspect the result, and share only the version that reveals no unwanted information. This practical reminder ensures your images remain safe and professional.
Ready to protect your screenshots and browser screens in real-time? Try AIBlurWeb today and share with confidence.
Written by Deepak
Founder & Solo Developer at AIBlurWeb
Deepak is the founder and solo developer of AIBlurWeb, a privacy-focused Chrome extension designed to help users protect sensitive information while sharing their screens online. He writes about screen privacy, sensitive-data protection, browser security, screen sharing, and AI-powered privacy tools, drawing from his hands-on experience building and improving AIBlurWeb. Read founder story →
Disclaimer: This article was initially drafted using AI assistance. However, the content has undergone thorough revisions, editing, and fact-checking by human editors and subject matter experts to ensure accuracy.