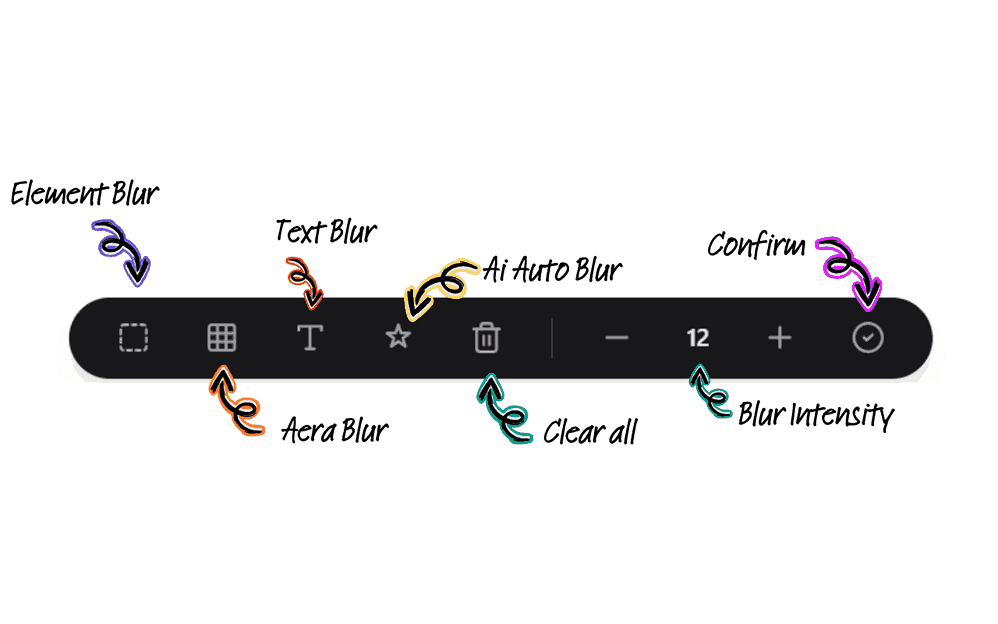
You’ve probably seen photos where a blurred background makes the main subject pop, but maybe your own attempts looked more like a fuzzy mess. In this guide, you’ll learn exactly what “blurring an image” means and get step-by-step methods to blur pictures using various tools – so you can create clean, professional blur effects every time.
Key Takeaways
- Image blur is a filter effect that smooths sharp transitions by averaging pixel colors, making details softer and the image appear smoother.
- Blur effects help focus attention on a subject by softening distracting details or busy backgrounds, effectively creating depth and highlighting the main subject.
- Common blur types include Gaussian blur (smooth weighted blur), motion blur (directional blur to simulate movement), and lens blur (creates bokeh style out-of-focus highlights).
- Blurring tools are available in photo editors (Photoshop, GIMP, Lightroom), mobile apps (Snapseed, Instagram, etc.), online editors (Canva, PineTools), or through code (CSS blur() filter, Python/OpenCV).
- CSS supports filter: blur() to apply a Gaussian blur to images in web pages. For programming, Python’s OpenCV offers
cv2.GaussianBlur()to blur images. - Best practices: Select the area to blur and adjust the blur radius; use layers or masks so you can fine-tune or remove the blur later. Duplicate or save your work before applying heavy blur, preserving the original if you need to edit or undo.
What Is Image Blur?
Image blur refers to an effect that softens edges and detail by blending neighboring pixels. When we blur an image, we make abrupt color transitions become gradual, smoothing out sharp contrasts. For example, Gaussian blur replaces each pixel with the average of nearby pixels weighted by a bell-curve (Gaussian) distribution. The result is a hazy, out-of-focus look. Gaussian blur acts on each pixel by setting its value to the average of all pixel values within a chosen radius. The larger the radius, the stronger the blur.
Other blur filters work similarly: Motion blur blurs pixels along a specific direction and distance, mimicking camera or object movement. Radial blur can zoom or spin around a point, simulating zooming effects. Lens blur (used for bokeh) blurs an image based on depth-of-field, keeping some areas sharp and others out of focus. The common theme is that blurring mixes each pixel with its neighbors, smoothing details. In short, blurring an image reduces sharpness by averaging pixels, making the scene look softer and smoother.
For example, if you have a sharp edge (like text on a sign), applying a blur filter will gradually blend the pixels on either side of that edge. The harsh line becomes a smooth gradient. This smoothing effect is why blur filters are called low-pass filters in image processing – they remove high-frequency detail (sharp edges) and keep low-frequency content. In practice, blurring can remove digital noise and reduce detail while preserving the overall structure of the photo.
Table 1: Common Blur Types and Effects
| Blur Type | Description | Common Uses |
|---|---|---|
| Gaussian Blur | Blurs using a bell-curve weighted average. | Softening backgrounds, reducing noise, smoothing edges. |
| Motion Blur | Blurs in a specified direction (speed, angle). | Simulating motion (cars, fans), action shots. |
| Radial Blur | Blurs in circular pattern (zoom or spin). | Zooming or spinning effects, creating dynamic focus. |
| Lens Blur (Bokeh) | Blurs based on depth (out-of-focus highlights). | Portrait backgrounds with round or shaped bokeh lights. |
| Box (Mean) Blur | Uniform average blur (fast but basic). | Quick blur when performance is needed (e.g., fast UI). |
Why Blur Images Matters
Blurring images is important for both creative and practical reasons. In photography and design, blur effects help create a sense of depth and focus. When you blur the background of a portrait or product photo, the subject stands out sharply against a soft backdrop. This mimics a shallow depth-of-field (like using a DSLR at low f-stop), drawing viewers’ eyes exactly where you want. In fact, controlling depth-of-field is a fundamental composition technique. (For tips on achieving depth-of-field in-camera, see our guide on Depth of Field Tips).
Blurring can also reduce clutter. A busy or noisy background might distract from the main subject. Blurring those distractions creates a clean, minimalist look. For example, street photos often use blur to make people or signs less prominent. Similarly, designers blur images to achieve a modern, dreamy aesthetic. Creative uses include motion blur for artistic movement, zoom blur for dynamic energy, or bokeh to scatter light in pleasing shapes.
On the practical side, blur is a key tool for privacy and obfuscation. Blurring sensitive information (faces, email addresses, license plates) is a common way to hide details in screenshots or shared images. For tips on securely masking information, refer to Blurring Sensitive Info in Photos. Blurring is also used in computer vision: preprocessing steps like edge detection often begin by blurring to reduce noise and false edges. In short, blur effects serve both artistic goals (emphasis, atmosphere) and functional needs (privacy, noise reduction).
The popularity of photo editing highlights the importance of blur. Smartphones now capture over 92.5% of all pictures, and around 40% of users regularly use photo-editing apps. Almost everyone has photos to edit, whether for social media, work, or personal memories. Among editing techniques, blurring is a staple. Remember: blurring doesn’t just hide or soften; it draws attention to what you keep sharp (often the subject) while rendering everything else gently out-of-focus. This emphasis makes compositions more impactful.
How Do I Blur an Image (Step-by-Step Methods)?
You can blur an image using many methods: applying filters, painting with a blur brush, or using automatic features. Here are common approaches.
Using Desktop Photo Editors
Desktop software like Photoshop or GIMP offer powerful blur tools:
Photoshop: Go to Filter > Blur to see options. The Gaussian Blur filter is quick: pick a radius to soften the whole image or a selection. Use the Blur Gallery (Field Blur, Iris Blur, Tilt-Shift) for interactive depth-of-field effects. For example, Field Blur places pins where you want different blur strengths, while Iris Blur creates circular focus zones. You can mask areas to blur only backgrounds. (For a detailed tutorial, see Photoshop Blur Tools.) A key tip: convert your layer to a Smart Object before blurring so you can change the blur later. Example: To blur a background in Photoshop, duplicate the layer, apply Gaussian Blur, then erase or mask out the subject area.
GIMP: Similar tools exist under Filters > Blur. The Gaussian Blur dialog lets you set horizontal/vertical radius. You can also try Selective Gaussian Blur (blur only if nearby pixels are similar) or Motion Blur for directional effect. Like Photoshop, use layer masks to target areas. For a beginner’s guide to the blur tools, see GIMP Editing Tutorial.
Lightroom (Mobile): Lightroom’s AI-powered Depth Blur (on supported phones) automatically detects subject and background. In Lightroom mobile, select Edit > Blur, then adjust the slider for overall blur. Use the Focus controls to define the in-focus region (Subject or manual point). You can visualize the depth map to fine-tune. This is great for emulating phone portrait mode on any photo. (Learn more in our Lightroom & Mobile Editing.)
Lightroom (Desktop/Photoshop Camera Raw): Use the Adjustment Brush set to Negative Clarity or Dehaze, or the Iris Blur in Photoshop for similar effects.
Using Smartphone Apps
Many mobile apps let you blur quickly:
Snapseed (iOS/Android): Use the Lens Blur tool. Pinch on the screen to resize/rotate the focus circle or line. Then swipe to adjust Blur Strength and Transition. Snapseed even lets you pick shapes for highlights (circle, star) to emulate bokeh.
Instagram Stories/Apps: Some apps like Instagram and Facebook offer built-in blur filters or focus effects. For example, Instagram’s Focus mode during a story blurs around a face. Third-party apps like PicsArt or AfterFocus provide sliders to blur backgrounds. In any app, look for “Portrait” or “Blur” tools.
Portrait Mode (iPhone/Android Camera): Modern phones have a Portrait or Depth mode in their camera app that automatically blurs the background (creating bokeh) while keeping the subject sharp. Simply shoot with this mode to get instant blur without editing.
Tip: When editing on a phone, zoom in on the subject, then apply a small background blur for a more natural look. Lightly paint the blur in layers for control.
Using Online Tools
If you prefer web tools, try:
Canva: Upload an image, add a photo to the canvas, select it, then go to Filter > Advanced options and use the Blur slider. Canva also has pre-built blur effects for quick results. (See Free Online Photo Editors for a list of similar tools.)
PineTools or Fotor: These sites have simple sliders or brush tools to blur photos. You usually upload an image, apply blur globally or with a brush, and download. No installation needed.
Photopea (web Photoshop): Open Photopea in a browser (it’s free and local) and use Filter > Blur. It supports Gaussian, Motion, and more, just like Photoshop.
Using Code (CSS & Python)
CSS blur() filter: In web design, you can apply CSS:
img { filter: blur(5px); }This applies a Gaussian Blur effect to the image. Increase the pixel value for stronger blur. For partial blur, use layered elements or SVG filters. The MDN docs explain how blur() is a standard filter function.
Python (OpenCV): In image processing scripts, use OpenCV’s functions. For example:
import cv2
blurred = cv2.GaussianBlur(image, (15,15), 0)This applies a Gaussian Blur with a 15×15 kernel to image. OpenCV also offers cv2.blur(), cv2.medianBlur(), and cv2.bilateralFilter() for various blur styles. (For more details, see OpenCV Image Processing Guide.)
Each method offers control over radius or strength. Generally, start with a small blur and increase gradually. For selective blurring, create a mask (layer or alpha channel) that defines the blurred area. For example, in Photoshop, paint a black-to-white gradient on a layer mask to vary blur intensity across the image.
Tools and Practical Applications
Adobe Photoshop – Photoshop’s Blur Gallery (Iris, Field, Tilt-Shift) and Filters (Gaussian Blur, Motion, Radial, Smart Blur) cover most effects. Photoshop also has a Blur Tool brush (on the toolbar) for manual smudging. When discussing Photoshop blur, see Photoshop Blur Tools. Example: Blurring a portrait’s background can be done by selecting the subject (with Select Subject or Lasso), inverting selection, and applying Lens Blur (under Filter > Blur) to the background layer.
GIMP – GIMP’s Filters > Blur menu includes Gaussian Blur and others. The Selective Gaussian Blur only blurs areas with minor color differences – useful for smooth gradients. GIMP’s Blur/Sharpen Tool brush can also paint blur by hand. (Learn more at GIMP Editing Tutorial.)
Lightroom (Desktop) – Use the Adjustment Brush or radial filters to decrease clarity or sharpness on parts of the photo, creating a blur-like effect.
Mobile Apps – We mentioned Snapseed and built-in camera modes. Other apps like PicsArt or Focos (for iPhone) let you manually blur backgrounds after the photo is taken, with adjustable blur circles (for iPhone) that simulate real aperture shapes.
Online Editors – Many online editors have easy blur tools. For example, in Canva you can blur images or backgrounds with a slider. Fotor and Pixlr also offer quick blur filters in one click. See our list of Free Online Photo Editors for more.
CSS and Web – As noted, CSS filter: blur() is widely supported. It’s handy for effects like hover blur on images or background blur behind modals (using backdrop-filter).
Programming – Besides OpenCV for Python, JavaScript libraries like PixiJS or even HTML5 Canvas allow custom blur shaders. But for most users, the above tools cover the need.
Creative Use-Case Example: To blur out a face or license plate, one can use either a pixelation effect or a strong blur. In Photoshop, select the face and apply Filter > Blur > Gaussian Blur. In GIMP, select and use the Blur brush. On your website, apply a CSS blur filter to that region (with absolute positioning). This way, the detail is unreadable, protecting privacy.
Bokeh Photography Tips – If you want real bokeh (the beautiful circle-of-light effect), use a fast lens (low f-number) and place distant lights in the background. Then open the aperture wide so those lights become blurred circles. For digital simulation, some apps let you pick the bokeh shape (e.g., hexagon, star). Learn more about creative bokeh in our Bokeh Effects Guide.
Next Steps / What’s Next?
Now that you know how to blur, keep practicing and exploring:
- Experiment with blur strength: Try varying the radius or strength. Small blurs can subtly guide the eye, while large blurs create dreamy backgrounds. See how different amounts change the mood of a photo.
- Combine techniques: Use blur with color adjustments or vignettes. For instance, blur the periphery of an image and darken edges to simulate lens vignetting, further isolating the subject.
- Selective blurring: Master layer masks or brushes so you can blur only the parts you want. Practice masking to blur edges of subjects for a natural look.
- Depth effects: Learn about depth-of-field in photography. If you shoot with a DSLR or smartphone portrait mode, use the manual controls to get sharp subjects and creamy bokeh.
- Sharpening: Blur and sharpen are opposites. If you accidentally blur too much or have a slightly fuzzy photo, use sharpen filters or AI unblur tools to regain detail. (See our Sharpen vs Blur Guide for when to use each.)
- Undoing blur: Note that blur is a loss of detail; you can never fully “unblur” an image. However, smart filters and non-destructive edits let you tweak blur later. If you overdo it, reduce the effect or restore the original layer.
- Stay inspired: Look at professional photography or graphic design using blur. Notice how subtle background blur or motion blur adds professionalism. Try adding dynamic blur to action shots or background blur to portraits.
Above all, experiment! Take a regular image, duplicate it, and apply different blurs. Save multiple versions with varying strengths. Over time, you’ll develop an eye for the right amount of blur and choose the right type (Gaussian vs. motion vs. bokeh) for each creative goal.
Conclusion
Blurring an image simply means smoothing out detail so that sharp edges become soft. This effect can dramatically improve an image by reducing distractions and making your subject stand out. Whether you’re creating artistic bokeh, simulating motion, or hiding sensitive information, blur is a versatile tool in your editing toolkit. We’ve covered blur types, use-cases, and step-by-step methods using popular software, apps, and code. Now it’s your turn to put it into practice: open your favorite editor, select a photo, and start experimenting with Gaussian Blur, motion blur, or manual blur brushes. Remember to save a backup of your original! With these techniques, you’ll find it easy to add polished blur effects to any image and elevate its visual impact.

Written by Deepak Jain — Founder & Solo Developer at AIBlurWeb
Founder & Solo Developer at AIBlurWeb
Deepak is an expert in screen privacy and browser security, passionate about protecting sensitive data while sharing visuals. Read more about the founder →
Reviewed by Samantha Lee — Senior Photo Editing Specialist
Disclaimer: This article was initially drafted using AI assistance. However, the content has undergone thorough revisions, editing, and fact-checking by human editors and subject matter experts to ensure accuracy.